
Adding a Power Jack
By JD Sleep
Add a nine volt power jack to your commercial effect box? Why, yes, you can! I’ve done this to several of my commercial pedals, including a couple of wah-wah pedals. For the sake of those who are “vintage sensitive”, I won’t mention all the pedals I’ve done this to. Nope, sorry. Don’t even ask. You’d may want to execute me for ruining all those great vintage pedals.
The standard type of direct current (dc) power jack used on most commercial pedals is known as a coaxial jack. The standard size of a power jack on most commercial pedals, is 2.1 mm inside diameter and 5.5 mm outside diameter. The standard wiring configuration of the power jack on most commercial pedals is as follows: the positive voltage will be on the outside shell and the negative voltage is to the center pin. This means, for most pedals the jack needs to be isolated from the enclosure since the shell (+9 volts) comes in contact with the enclosure (ground). The jacks I commonly use now are plastic, so they are isolated and insulated from the grounded metal enclosure. For metal jacks, I have isolated the jack with a rubber grommet. You can also use nylon washers that are available from Mouser. Some pedals won’t need to have the jack isolated from the enclosure because they have a “Positive Negative Positive” (PNP) transistor circuit. This type of circuit uses the positive 9 volts as reference and if the enclosure conducts current it will be positive voltage. Examples of this are:
- Fuzz Face
- Vox Tone Bender
- Octavia
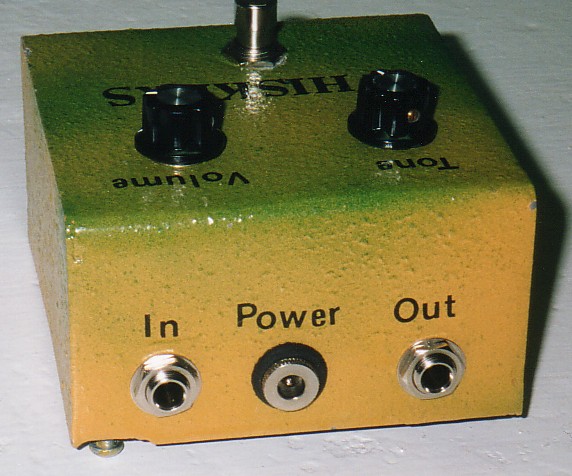
Here’s the easy way to a add power jack to your commercial pedals.
- You can use almost any kind of DC jack. You don’t need to have one with internal switching, because in this case, you will never be switching between battery and DC Jack.
- If you need to, use rubber grommets available from hardware stores, size 3/8″ inside diameter, 1/2″ outside diameter. See discussion above to determine if you need one or not
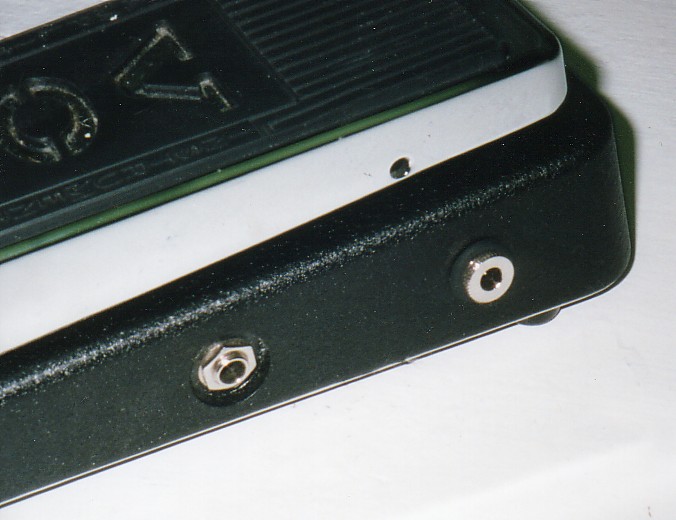
- Drill a 1/2″ hole in the enclosure of the pedal and de-burr the hole. Insert the grommet in the hole.
- Remove the nut from the jack and toss it aside, you won’t need it.
- Carefully “screw” the jack into the rubber grommet (it is a very snug fit) from the outside of the enclosure. The jack should stay in place without needing a nut.
- Solder a battery snap to the jack, red wire to the center pin, black wire to the shell. Some things to note:
- To stabilize the jack you are soldering, I recommend that you plug a male jack into it. This will hold the center pin in place as you solder since it can easily move out of place if you don’t.
- Don’t be confused by the wire colors here. Even though the “black” wire is connected to the shell, it is still carrying the positive voltage, it’s just that you’re using the snap in a reverse position from what it is normally intended to be.
- Snap the new battery snap to the battery snap of the effect. The effect’s battery snap will now receive power from the external jack.
This is a very easy way to get power to the pedal without disturbing any of the wiring in the pedal. It also allows you to easily slap a battery back into the effect should you ever need to. You don’t have the auto switching from battery to plug, like you do on most commercial pedals, but for my purposes that’s not an issue. If you do want automatic power switching between jack and battery, check out the Effect Power Switching Page.
I would be remiss if I didn’t at least mention the inherent problems of dc power derived from alternating current power. The main problem is hum and buzz noise added to the audio signal in some pedals or situations. Make sure the power supply is well filtered and regulated. Most wall warts aren’t.
Even with filtered and regulated power you still may be susceptible to some noise problems. Think of it as a dog… or a child… don’t assume that because it is well behaved at home that it will behave well at other places.
For example, one of the worst sinking feelings I’ve had involved taking my rig to a studio and hearing the ridiculously high level of background noise coming from my pedal board. It was horrible and I had to think quick to get something workable together. I had a similar problem at a gig using an unfamiliar PA system.
As it turns out the problem at the studio was due to some unfiltered power in my board. At the gig it was a ground loop problem in my rack. In both cases, I was not able to directly correct the problem on the spot.My advice to you is to be prepared with a contingency plan in case your standard setup doesn’t work out, the same way you would be with your rack mount equipment, tube amp, etc.
Happy Power Supplying!